Unlock Savings: Subscribe for Exclusive Discounts!
Ready for adventure? Subscribe to our newsletter and unlock exclusive discounts on accommodations and travel experiences! T&C Apply.
To begin your journey as a host on MyRehat, follow these simple steps:
Visit www.myrehat.com
Locate and click the “Become a Host” button on the top right corner of the homepage menu.
After clicking “Become a Host,” you will be directed to the registration page. Here, you’ll need to provide the following credentials:

Username: Choose a unique username.
Email: Enter your email address.
Password: Create a secure password.
After providing these details, you’ll receive a verification email from us.
Yes, email verification is a crucial step to ensure the security of your account and the trust of potential guests. After registration, you’ll receive an email with instructions on how to verify your email address. Be sure to click the verification link provided in the email.
After registration, there are two important steps to complete:
You can submit these documents by heading over to
“MyRehat” > “Dashboard” > “Profile” > “Verification.”
This information is essential to ensure the security and authenticity of your host account.
You will need to set up your payment method so we can transfer your earnings when requested. To set up your payment method, simply go to
“MyRehat” > “Dashboard” > “Profile” > “Payment Method.”


You can fill in your contact information by heading over to
“MyRehat” > “Dashboard” > “Profile”
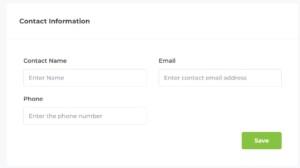
This information is vital to ensure guests can effortlessly reach out to you after completing the booking payment.
MyRehat charges a host fee of 15% for each booking, but there are no fees associated with the initial registration process or becoming a host. You can find detailed information about service fees and host payouts in your host dashboard in the “Wallet” section.
Becoming a host on MyRehat is a straightforward process, and our platform is designed to help you every step of the way. We look forward to welcoming you to our community of hosts and guests. Happy hosting!
To list your accommodations on MyRehat, follow these steps:
Log in to MyRehat >> “Dashboard” >> “Listings” >> “Add Listings”
You need to provide the following information:
Yes, you can enable instant booking in the “Pricing” section, allowing guests to make reservations without requesting your confirmation.
You can set different pricing options:
MyRehat provides the following cancellation policies for hosts and guests:
It’s important to be aware of and understand the specific policy associated with your booking on MyRehat, as it can impact the refund you receive in case of cancellation.
Yes, you can set up extra services for your guests such as providing food, a personal driver and more. Example as below:


Minimum size: 16:9 ratio at 800x600px.
If you encounter issues with photo size, you can contact MyRehat for assistance with uploading your pictures.
To input your address and geolocation on MyRehat, follow these steps:


Yes, you can sync your MyRehat listings with other OTAs using the iCal format, which is supported by most OTAs. Here’s how to do it:
Export: This allows you to generate an iCal link for your MyRehat listing.
Import: Use this option to input the iCal link from other platforms.

Reserve: This is where you can manage reservations.
For detailed guides on how to sync calendars with specific OTAs like Airbnb, Agoda, Booking.com and Tiket.com, you can refer to the provided links. Please ensure that your OTA platforms support the iCal format, as this is essential for successful synchronization with your MyRehat listings
No, MyRehat doesn’t publish your listings immediately. After you submit your listings, MyRehat will conduct a verification process. Once your listings have been checked and verified, you will receive an email notification confirming that your listings have been published on the website. This process ensures that the listings meet MyRehat’s standards and are ready for guests to view and book.
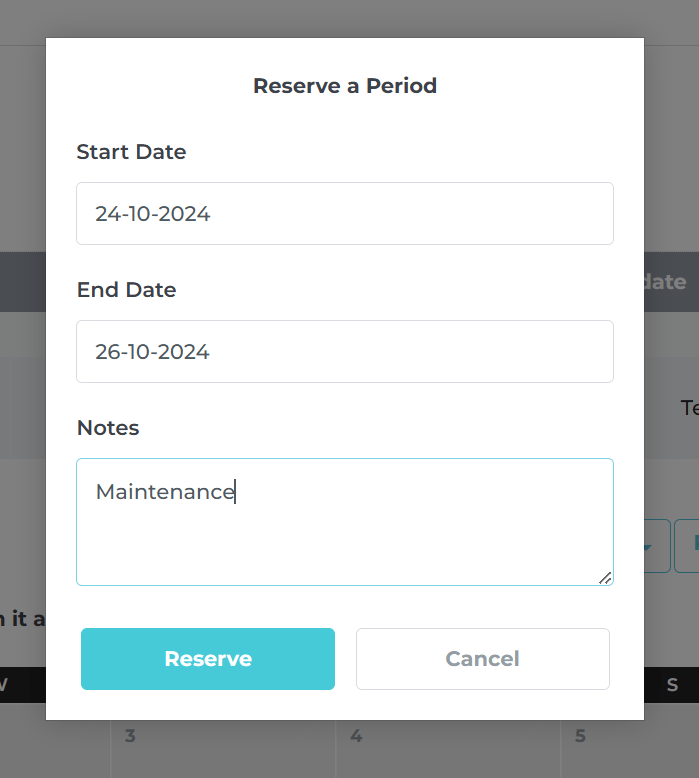
Yes,
go to Listings > Select your listing > Action > Edit > Calendar, then click “Reserve a Period.”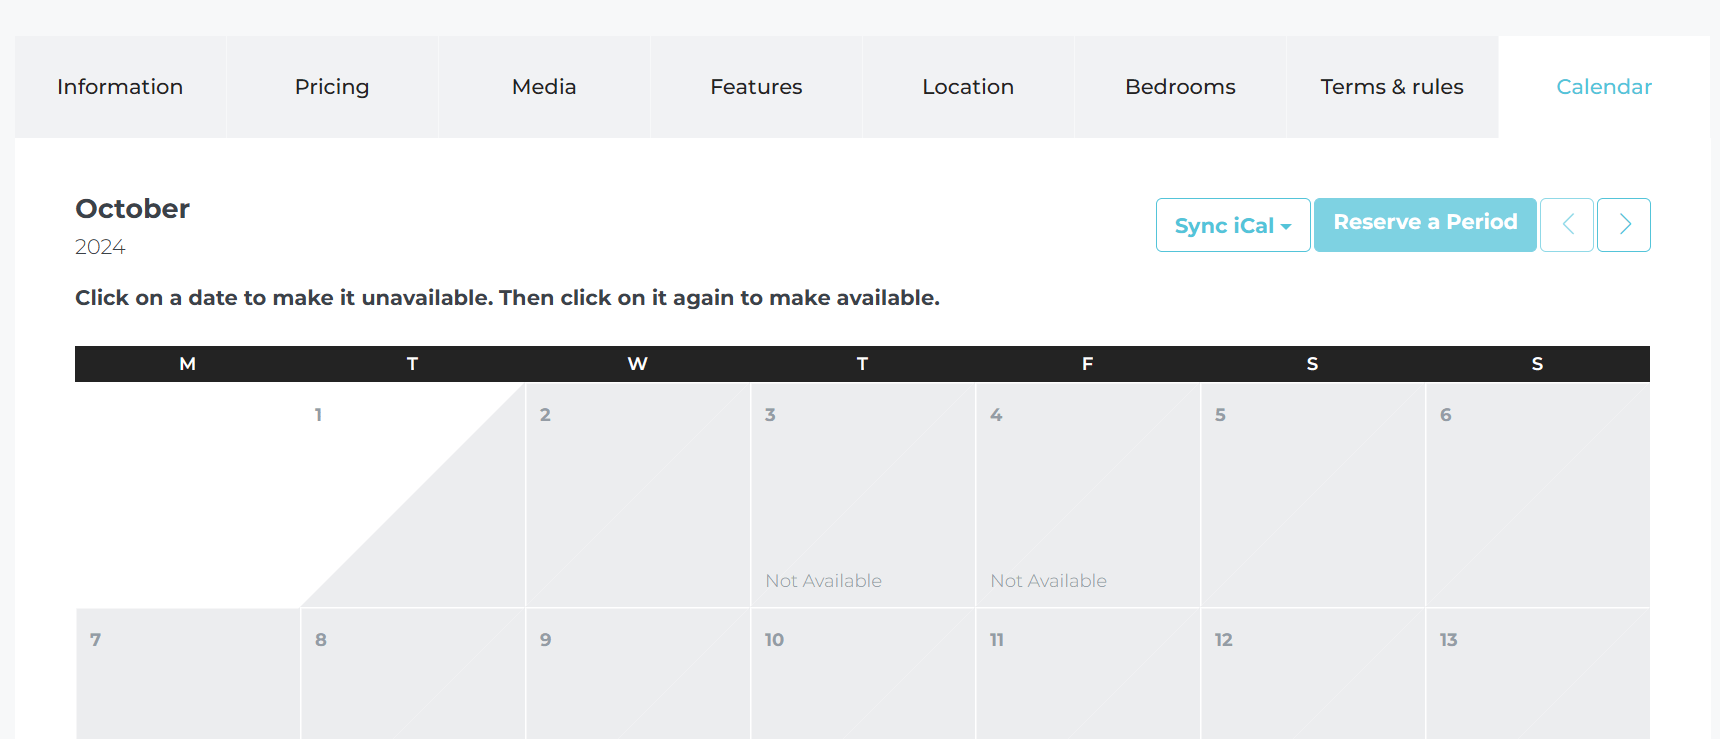
1. Access the Coupon Creation Page
Log in to the dashboard and navigate to the Coupons section. Click Add New Coupon.
2. Fill in the Coupon Details :
Coupon Code
Enter a unique code customers will use at checkout.
Example: myrehat15
Discount Type
Select how the discount is applied.
Percentage Discount – a percentage off the total price.
Fixed Amount – a set amount off the price.
Display Coupon to Public
Choose Yes if you want customers to see the coupon on the public site.
Choose No if you want it hidden and shared manually.
Coupon Amount
If using a percentage discount, enter the % number.
Example: 10 for 10% off.
3. Apply to Listings
From the dropdown menu, choose All Properties to apply to all listings, or select specific properties.
4. Set Usage Limits
Usage Limit
Maximum number of total redemptions allowed.
Example: 0 means unlimited.
Usage Limit Per User
How many times a single customer can use the coupon.
Example: 1 means each customer can only use it once.
5. Set Validity Period
Start Date
Date when the coupon becomes active.
End Date
Date when the coupon expires.
6. Save the Coupon
Click Save Coupon to activate it.
Your coupon will now be ready for use according to the settings you chose.
If your listing is configured for instant booking, you can easily communicate with your guests by following these steps:

After the payment is processed, you’ll get their name, phone number, and email in your inbox. At the same time, the guest will receive your contact details.
To set up your Contact Information, follow these steps:
Yes, you can use your host account to book listings on MyRehat.
In fact, you can even add listings to your favorites, making it convenient to keep track of and book accommodations that you find appealing. MyRehat offers this feature to enhance your user experience, whether you are hosting or looking for a place to stay.
To review, simple head over to
MyRehat >> “Dashboard” >> “Revervations” >> Click one of the Reservations >> “Review”

In addition, MyRehat provides a review system for both hosts and guests, allowing users to share and receive feedback about their experiences. It’s important to note that MyRehat verifies reviews for safety reasons, ensuring the credibility and authenticity of the feedback provided by users.
You can easily check your earnings on MyRehat by following these steps:
To request a payout on MyRehat, you need to ensure that you have set up your payment method. Here’s what you need to do:
Visit “MyRehat” > “Dashboard.”
Go to “Profile” and select “Payment Method.”
Set up your preferred payment method to receive your earnings.
The minimum payout amount on MyRehat is RM100. You can request a payout once your earnings reach or exceed this threshold.
MyRehat typically processes payout requests within 4 to 10 business days. Please allow this timeframe for the funds to be transferred to your account.
These guidelines and steps ensure a hassle-free process for tracking earnings, requesting payouts, and receiving your well-deserved income as a MyRehat host.
To begin your journey as a host on MyRehat, follow these simple steps:
Visit www.myrehat.com
Locate and click the “Become a Host” button on the top right corner of the homepage menu.
After clicking “Become a Host,” you will be directed to the registration page. Here, you’ll need to provide the following credentials:

Username: Choose a unique username.
Email: Enter your email address.
Password: Create a secure password.
After providing these details, you’ll receive a verification email from us.
Yes, email verification is a crucial step to ensure the security of your account and the trust of potential guests. After registration, you’ll receive an email with instructions on how to verify your email address. Be sure to click the verification link provided in the email.
After registration, there are two important steps to complete:
You can submit these documents by heading over to
“MyRehat” > “Dashboard” > “Profile” > “Verification.”
This information is essential to ensure the security and authenticity of your host account.
You will need to set up your payment method so we can transfer your earnings when requested. To set up your payment method, simply go to
“MyRehat” > “Dashboard” > “Profile” > “Payment Method.”


You can fill in your contact information by heading over to
“MyRehat” > “Dashboard” > “Profile”

This information is vital to ensure guests can effortlessly reach out to you after completing the booking payment.
MyRehat charges a host fee of 15% for each booking, but there are no fees associated with the initial registration process or becoming a host. You can find detailed information about service fees and host payouts in your host dashboard in the “Wallet” section.
Becoming a host on MyRehat is a straightforward process, and our platform is designed to help you every step of the way. We look forward to welcoming you to our community of hosts and guests. Happy hosting!
To list your experiences on MyRehat, follow these steps:
Log in to MyRehat >> “Dashboard” >> “Experiences” >> “Add New”
You need to provide the following information:
Yes, you can enable instant booking in the “Pricing” section, allowing guests to make reservations without requesting your confirmation.
MyRehat provides the following cancellation policies for hosts and guests:
It’s important to be aware of and understand the specific policy associated with your booking on MyRehat, as it can impact the refund you receive in case of cancellation.
Minimum size: 16:9 ratio at 800x600px.
If you encounter issues with photo size, you can contact MyRehat for assistance with uploading your pictures.
To input your address and geolocation on MyRehat, follow these steps:


Yes, you can sync your MyRehat experiences with other OTAs using the iCal format, which is supported by most OTAs. Here’s how to do it:
Export: This allows you to generate an iCal link for your MyRehat experienes.
Import: Use this option to input the iCal link from other platforms.
Reserve: This is where you can manage reservations.
Please ensure that your OTA platforms support the iCal format, as this is essential for successful synchronization with your MyRehat experiences.
No, MyRehat doesn’t publish your experience immediately. After you submit your experience, MyRehat will conduct a verification process. Once your experience have been checked and verified, you will receive an email notification confirming that your experience have been published on the website. This process ensures that the experience meet MyRehat’s standards and are ready for guests to view and book.
If your listing is configured for instant booking, you can easily communicate with your guests by following these steps:


Additionally, you will receive email notifications, allowing you to stay informed about guest messages and promptly respond to their requests.
After the payment is processed, you’ll get their name, phone number, and email in your inbox. At the same time, the guest will receive your contact details.
To set up your Contact Information, follow these steps:
Go to “MyRehat” > “Dashboard” then click on “Profile.”
Navigate to “Contact Information.”
Enter your name, phone number, and email.
Yes, you can use your host account to book experiences on MyRehat.
In fact, you can even add experiences to your favorites, making it convenient to keep track of and book your activities that you find appealing. MyRehat offers this feature to enhance your user experience, whether you are hosting or looking for a place to stay.
To review, simple head over to MyRehat >> “Dashboard” >> “Revervations” >> Click one of the Reservations >> “Review”

In addition, MyRehat provides a review system for both hosts and guests, allowing users to share and receive feedback about their experiences. It’s important to note that MyRehat verifies reviews for safety reasons, ensuring the credibility and authenticity of the feedback provided by users.
You can easily check your earnings on MyRehat by following these steps:
To request a payout on MyRehat, you need to ensure that you have set up your payment method. Here’s what you need to do:
Visit “MyRehat” > “Dashboard.”
Go to “Profile” and select “Payment Method.”
Set up your preferred payment method to receive your earnings.
The minimum payout amount on MyRehat is RM100. You can request a payout once your earnings reach or exceed this threshold.
MyRehat typically processes payout requests within 4 to 10 business days. Please allow this timeframe for the funds to be transferred to your account.
These guidelines and steps ensure a hassle-free process for tracking earnings, requesting payouts, and receiving your well-deserved income as a MyRehat host.
To register as a guest on MyRehat.com, go to the top right corner of the navigation bar and click “Register.” Fill in the required credentials and MyRehat will send you a confirmation email to complete the registration process.
Yes, you can instantly book accommodations without registration or login. MyRehat will automatically create an account for you using the provided email address and a password, and then send the login details to your email. This ensures a hassle-free booking experience.
To check your reservations, navigate to “MyRehat >> Dashboard >> Reservations.” Here, you’ll find a list of your booked accommodations and their details. You can only check your reservations after completing the registration process.
You can leave a review for your stay by following these steps:

You can message the host in two different scenarios depending on the host:

Additionally, you will receive email notifications, allowing you to stay informed about the responses from the host.
Yes, you can save your favorite listings for easy access. To do this, simply browse the listing you like and click on the “Add to Favorites” or “Save” option. You’ll be able to access your favorite listings in your account for future reference.
If you haven’t received a confirmation email, please check your spam or junk folder. If you still can’t find it, you can contact us to verify your email.
Ready for adventure? Subscribe to our newsletter and unlock exclusive discounts on accommodations and travel experiences! T&C Apply.
Address
Level 4-1, Sunway Putra Mall,
100, Jalan Putra, Chow Kit, 50350 Kuala Lumpur, Malaysia




Log in
Don't have an account? Register
Register with your email
Do you already have an account? Log In
Please enter your username or email address. You will receive a link to create a new password via email.